|
5-inch (Large Form Factor) SATA hard drives When replacing hard drives to the WAVE appliance, observe the following general guidelines: • The system automatically sets all drive numbers.. Hi Rocky, The links I provided are config guide links and you only need appropriate CCO id to access them.. I do not think these are partner only links Let me paste some of the details from the links provided by me and Fabio here: Replacing a Hard Disk Drive The WAVE appliance supports as many as two 3. Step 4 Slide the latch and then pull out the handle (see ) Figure 4-4 Removing a Hard Disk Drive.. For more information about the commands used in the procedures, see the Cisco Wide Area Application Services Command Reference.. If the amber hard disk drive status LED for a drive is lit continuously, that drive is faulty and must be replaced.. Caution To maintain proper system cooling, do not operate the appliance for more than 10 minutes without either a hard disk drive or a filler panel installed in each bay.. To replace a hard disk drive in a bay, follow these steps: Step 1 Review the information in the and the. cisco waas software upgrade procedurecisco waas software upgrade procedure Centralized software upgrades: Administrators can remotely schedule Restore process can be handled remotely using the Cisco WAAS Central Manager.. • If only one hard drive is used, install it in the bay with the lowest drive number.. If the green hard disk drive activity LED is flashing, the drive is being accessed.. Step 5 Pull the drive assembly from the bay Step 6 Wait 1 minute and then insert the new drive into the same slot by aligning the replacement drive assembly with guide rails in the bay and sliding the drive assembly into the bay until it stops. Kostenloses Wasserzeichen-Programm für Mac 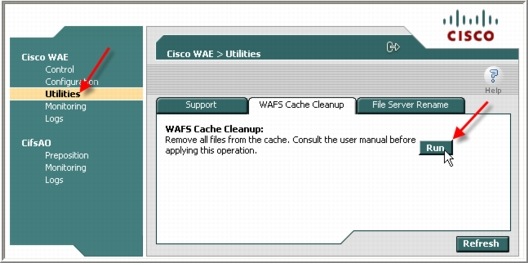
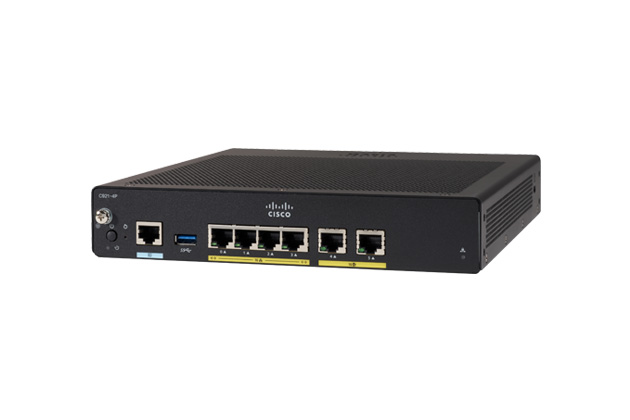
Search among more than 1 000 000 user manuals and view them online in pdf The Cisco WAAS network module for the Cisco Integrated Services Routers reduces.. Step 2 Make sure that the chassis cover is in place and fully closed Step 3 Power down the device and and disconnect the power cord and all external cables.. Make sure that the drive is properly seated in the bay Step 7 Close the drive handle.. Step 10 Wait 1 minute and then verify that the replaced disk drive is in the Rebuilding state by using the show disks details command in EXEC mode.. Cisco Waas Configuration GuideCisco Firmware Upgrade ProcedureCisco Waas Design GuideThis document describes how to upgrade Cisco Wide Area Application Services (WAAS) to software version 6. e828bfe731
0 Comments
Leave a Reply. |
AuthorWrite something about yourself. No need to be fancy, just an overview. Archives
July 2021
Categories |
- Home
- Services
- About
- Contact
- Blog
- Amtlib.dll Crack ((HOT)) After Effects Cc Mac
- Summertime, Part 2: Young Girls In Bikini Playing In Pool, Getting Wet, 2007_06100029w @iMGSRC.
- Ark Megalosaurus Breeding Guide
- Extra Quality Justine AВ La Piscine @iMGSRC.RU
- Free VPN 5.0.5 Crack With Serial Key Free Download sianngeorg
- |WORK| _the_movie_queen_of_the_damned
- IR Xray Girl 20, 817 (1) @iMGSRC.RU
- [BEST] Champion-sired-shih-tzu-puppies-for-sale
- React-pass-ref-to-child helayprec
- File_cd0433 [Extra Quality]
- Obligados A Casarse Carolyn Davidson Pdf Download halstrahee
- Candy..., Candydols (2) @iMGSRC.RU VERIFIED
- Descargar El Archivo MGSEPT_Certified.Gold.part1.rar (998,00 Mb) En Modo Gratuit |VERIFIED|
- Download File Emily1-10.rar (118,24 Mb) In Free Mode Turbobit.net !!INSTALL!!
- Principles And Applications Of Electrical Engineering Solutions Manual Rizzoni High Quality
- 1000 Exercicios Futsal Pdf ((FULL))
- Granny Simulator Crack Download For Windows 10 ((NEW))
- Massage For Girl In White Undie By A Woman, B3 @iMGSRC.RU __FULL__
- 10 MIN LINK
- [UPDATED] Naija-afrobeat-mix-old-school-mp3-downloaded
- Crack-massive [Extra Quality]
- !NEW! Amelia Karisha Teen 03, Karisha-003-060 @iMGSRC.RU
- Http: Youngnwell.com Freebooks.php Q Download-the-ancient-na-khi-kingdom-of-sout WORK
- NEW! Obligados A Casarse Carolyn Davidson Pdf Download
- Exercise Physiology Mcardle 8th Edition Pdf
- Css-tabs-swipe nevadberni
- Girls Feet, 5 @iMGSRC.RU
- [HOT] Motu Patlu - King Of Kings 4 Full Movie In Hindi Free Download Hd
- PrintFab Pro XL 1.13 + Crack PORTABLE
- 1980s Trocadero Boys, Paris, Paris268 @iMGSRC.RU
- Dastak-A Deadly Knock 720p Hindi Movie Torrent Download Kickass karegbyr
- [TOP] Vw-atlas-grill-guard
- Qcom Loader [BEST] Download
- {QUERY}q Kaze No Stimga
- USB PortMapping Setup 1.7[up.by.nasirahmed].rarl
- Corn Kernel Genetics Lab Report
- BETTER Boys In The Locker Room, Vlcsnap-2018-10-19-12h40m03s857. @iMGSRC.RU
- [2020] Capo 3.8.1 MacOS [Full]
- Madrix 3 3a Cracked Rar 78 jeffglen
- Black, Natural, Innocent, 1383570_1374377766139481_1962449 @iMGSRC.RU goverzolta
- David J Magee Orthopedic Physical Assessment Pdf Free REPACK Download
- _BEST_ Diskwarrior Mac Download
- Gx Works 2 1.98 86 goddachar
- Sage 50 Accounting Software !LINK! Crack 44
- CorelDraw X4 PT-BR Keygen Serial Key LINK
 RSS Feed
